GPS mounting Rev. 2.0
Well, basically, version 1.0 was not very reliable. The reason it started flopping around I found out this morning when I checked it was that the ball bracket cracked! Thank goodness my GPS did not fall off the bike! Grrr. Not totally impressed with RAM's plastic parts. For some reason on all the websites I'm thinking Aluminum.. BBBRRZZT. I mean I knew that when I bought them at the store they were not. Erg. Digressing. System 1 did not work so I was back at square 1 (or square zero not having a clue what to do).
Then.. it dawned on me. Oh.. how simple! I had picked up some scrap aluminum plate at Navy City Metals on Friday for the car's camera mount. And there was more than I need for that project (I think). So then I thought I'd bend a bracked out of it and mount the GPS to that! Excellent. But not sure how to attach the bracket to the bike. Standstill.
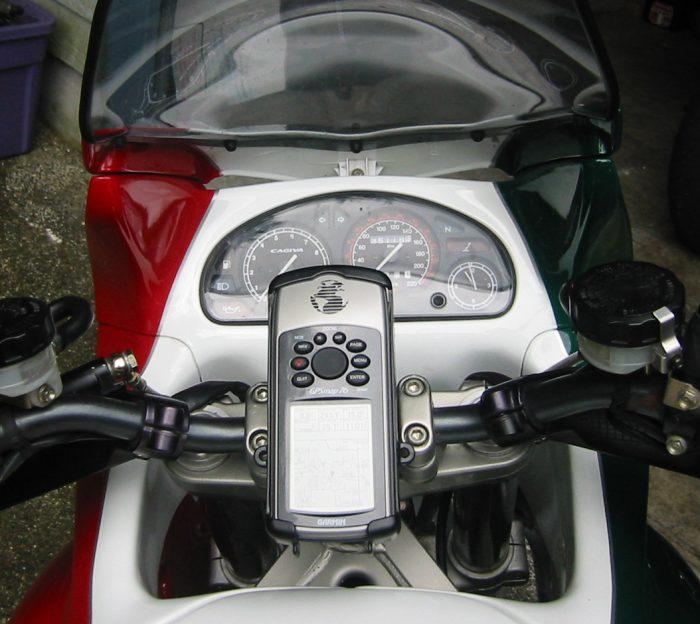 Then.. epiphany number 2. I don't need no stinking bracket. That stainless U-bolt that I bought for system 1.0 could be used on the handle bar as before but instead of some arm/mount system I would bolt the GPS cradle right to the bars. And guess what right in the center there was just the right amount of room. So that's the first picture you see here.
Bolted it up and popped it in. Perfect. Now it was just a matter of adding the power wire cable to the bike so I would not have to run off batteries. There is a channel in the base of the cradle for the power cord to plug in the back. Man, I'm a genious! I.. er. drilled the hole and put the fastener RIGHT under the plug. I could not have done a better job of putting it in the wrong place if I'd done it by design. Nice work.
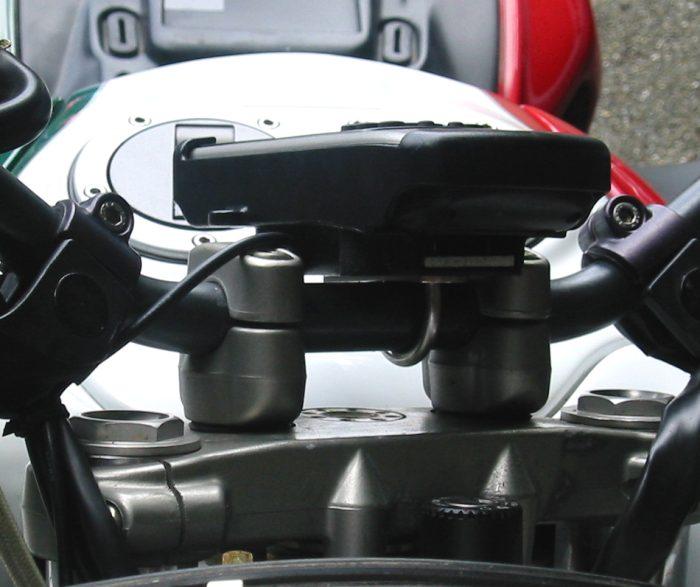 So this is how we come to the next picture. Remove the bracket and re-drill another set of holes. But now I'm thinking it's going to just crack down the center under the vibration (and twins do vibrate after all) and fail.
 Then epiphany number 3! That plate I was going to use to bend up a bracket could be cut to become a nice large backing plate for the cradle so there would be less need for it to flex and even if it did crack the likelyhood of it coming off the bike would be very low indeed! So hacksaw and pen at the ready I re-drilled the holes so they would NOT interfere with the plug this time, drilled the backing plate, bolted it all down on the bike and viola! Problems solved, GPS mounted, power plug fits... the world is a grand old place. Except.. now I need to figure out how to wire it into the bike.
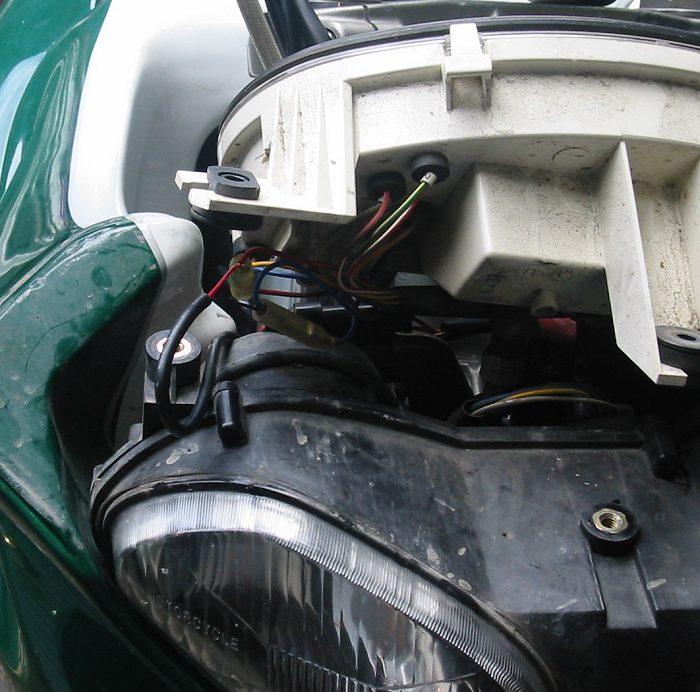 This now brings us to photo number 3. The rocket scientists at Cagiva saw to it that there was constant power to the dashboard at all times, in the form of power to the clock! YES! No need to rip apart the entire bike (too bad I'd already done that) to find some power for the GPS. I wanted it to be on all the time so I could turn off the bike while still checking possition or updating waypoints etc. It will draw 1 Amp MAX and I carry bike jumper cables anyway. I hope I never regret this decision.
Once again, digressing to the topic at hand. They also saw fit to place the power to the clock on it's one seperate pair of wires (red hot, blue ground) so they were super easy to find and even easier to solder my new Garmin GPS power wires too! The world had come back to center, all was good and I could go out and test ride the bike.. except.. I have the kids today and I can't take them on the bike for a test ride. Grounded.. no flights today.
All was not lost though, I did get out the DRZ250 and putted both of them around the yards for about 15 min. I think the oldest (Miranda) had the most fun giggling and such all the way up the gravel side-road. In the end it turned out to be a more perfect day than I had planned. Now.. I just need to get them some proper helmets (the bicycle helmets are just not really designed for that use).
posted by Foto Veloce @ Sunday, September 04, 2005
0 comments
![]()
![]()

0 Comments:
Post a Comment
<< Home